


January 4, 2026
Rack Attack Team
Let’s be honest: standing in your driveway trying to figure out if a roof rack will actually fit your car is the definition of "pre-trip stress." You’ve got the kayak ready, the mountain bikes are oiled up, and the kids are already buckled into the backseat—but you’re stuck staring at your roof wondering if you bought the right parts. You’re asking yourself: Will this damage my paint? Is it going to whistle like a freight train on the highway? Did I just waste five hundred dollars?
At Rack Attack, we see this "buyer’s remorse" every single day. The truth is, the "best" brand on the market doesn't matter one bit if the fit isn't perfect for your specific vehicle. Whether you are caught in the classic debate of Thule vs. Yakima or you’re just trying to figure out what a "crossbar" actually does, this guide is your roadmap to a stress-free setup. Built on decades of hands-on experience and thousands of installs, we’re stripping away the technical jargon to give you the facts you need to turn your car into the ultimate adventure machine.
1. Anatomy 101: What’s Actually on Your Roof?
Before you hit "add to cart," you need to understand that a "roof rack" isn't a single product. It is a modular system, a precision-engineered kit designed to move heavy loads at 70 miles per hour. Most modern systems are comprised of three (and sometimes four) essential components that work in harmony.
The Building Blocks of Your System
- The Fit Kit (Thule) or Landing Pad (Yakima): This is the foundation. It consists of vehicle-specific rubber pads and metal brackets that "handshake" with your roofline. Because every car's roof has a unique curve and width, this piece is non-negotiable. Thule sticks to the term "Fit Kit," while Yakima uses various names like "Landing Pads," "Sight Clips," or "Base Clips" depending on whether you have a smooth roof or factory mounting points.
- The Towers: Also known as "feet," these are the structural legs of the rack. They click into the fit kit and provide the vertical support needed to hold your bars. They house the tensioning mechanisms that keep everything tight.
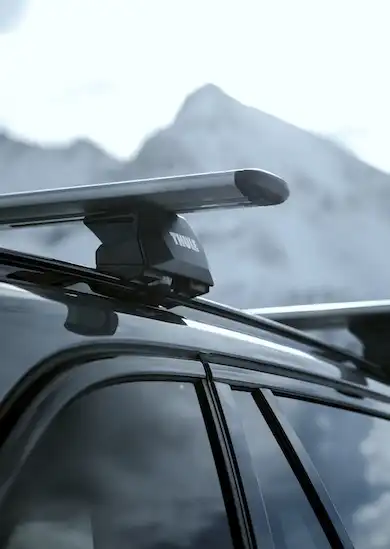
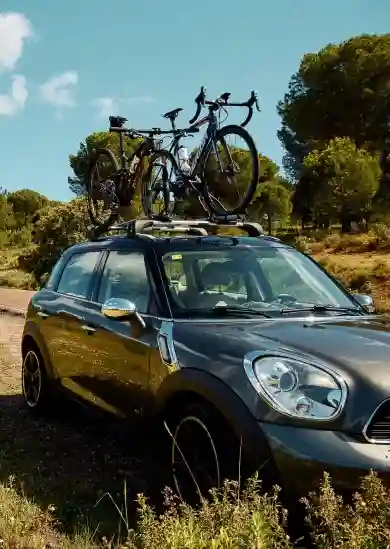
- The Roof Rack Cross Bars: These are the horizontal bars that span the width of your car. This is the part you actually see and interact with. It’s where your bike racks, cargo boxes, and kayak carriers attach.
- Lock Cores (The Essential Insurance): While technically an elective add-on, we consider these mandatory. High-end racks are an investment, and lock cores ensure that your towers can't be loosened or removed by anyone without a key. It’s the difference between coming back to your car and finding your rack—or an empty roof.
The Interface: How You Use the Bars
The biggest difference you’ll notice in daily use is the "interface" of the bars. For example, the Thule Evo Wingbar uses a clever "SwingBlade" end cap. You simply swing it open to access the T-track, allowing you to slide accessories in without cutting rubber strips. Yakima’s JetStream bars handle it differently with a "Push-Down" rubber strip. You don't remove anything; you just push your hardware down into the track and slide it along. It’s a matter of personal preference, but these small details are what separate a good experience from a great one.
2. The "Will It Fit?" Test: Identifying Your 5 Roof Types
The secret to a perfect fit isn't in the brand name; it’s in your roof's DNA. Before you look at bars, you must identify your vehicle's roof type. We use the "Hand Test" to make this foolproof.
- Type 1: The Raised Rail (The SUV Icon)
- The Test: If you can slide your hand completely between the rail and the roof, you have a Raised Rail.
- The Benefit: These are the "golden child" of racks. Because the rail is already there, you usually don't need a separate fit kit. The towers simply clamp around the rail. It’s the fastest install and usually the most budget-friendly.
- Type 2: The Flush Rail (Sleek and Integrated)
- The Test: You can see the rail, but you can't get your fingers under it. There is no gap.
- The Requirement: These require a specific fit kit that "grips" the inner and outer lip of the rail. It’s a very clean, factory-style look.
- Type 3: Fixed Points (The Hidden Anchors)
- The Test: Look for four small plastic "trap doors" on your roof. Flip one open, and you'll find a threaded hole or a metal bracket.
- The Benefit: This is arguably the most secure way to mount a rack. The system bolts directly into the frame of the car. It’s sturdy, aesthetic, and incredibly reliable.
- Type 4: Bare Roof (The Blank Canvas)
- The Solution: You’ll use a system where custom clips reach into your door jamb. When you close your doors, they "clamp" the rack in place.
- The Pro Tip: Don't worry about your paint; these clips are rubber-coated and custom-molded to your car's exact door frame. They are also 100% removable, making them perfect for leased cars.
- Type 5: Rain Gutters (The Rugged Legacy)
- The Solution: Simple gutter clamps are used here. While they are very strong for traditional loads, be careful with modern rooftop tents, as the gutters themselves are often the weak point, not the rack.
3. The Brand Battle: Thule vs. Yakima Showdown
So, who wins the Thule vs. Yakima debate? It’s less about "which is better" and more about "which philosophy matches yours."
Thule: The Swedish Engineer
Thule is known for precision. Their towers often utilize internal steel rods for maximum rigidity. They have a reputation for being slightly more intuitive for the "first-time" installer. Thule products also go through rigorous European testing certifications that are among the toughest in the world. If you value a "set it and forget it" mentality with a sleek, minimalist aesthetic, Thule is often the winner.
Yakima: The American Workhorse
Yakima, born in the Pacific Northwest, is the king of versatility. Their towers often use high-strength nylon composites. While some find them a bit more "finicky" to torque down perfectly the first time, they offer incredible flexibility. Yakima’s "HD Bars" are legendary in the overlanding community for their sheer strength and integrated tie-down points. If you’re the type of adventurer who is constantly switching between bikes, kayaks, and heavy cargo, Yakima’s ecosystem is hard to beat.
Does it matter where they are made?
For some, this is a tie-breaker. Thule is Swedish, but they manufacture many of their cargo boxes and components right here in the United States. Yakima is an American brand that now manufactures much of its hardware in Mexico. Both maintain industry-leading quality control, but the "Made in USA" tag on Thule’s premium boxes is a point of pride for many customers.
4. The Performance Factors: MPG, Noise, and Clearance
Installing a rack changes your car's profile, and there are three "hidden" factors that every owner needs to prepare for.
The Fuel Economy Hit
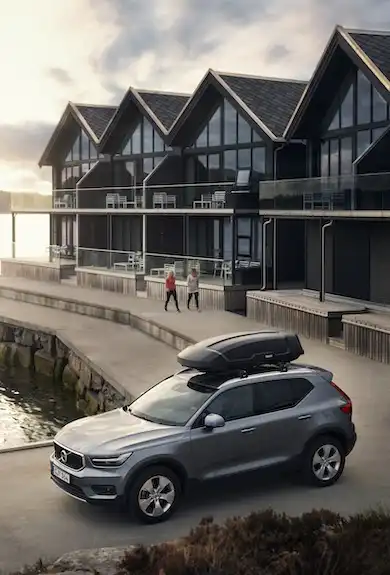
Let's be honest: putting a giant plastic box or a pair of 14-foot kayaks on your roof is going to affect your gas mileage. An empty, square-bar rack can drop your MPG by 10%. A fully loaded car on the highway might see a 20-25% decrease.
- The Fix: Go for "Aero" bars. The Thule Wingbar and Yakima JetStream are shaped like airplane wings. They cut through the air, significantly reducing drag and saving you money at the pump over long road trips.
The Infamous "Roof Rack Whistle"
At 60 mph, wind can turn your roof rack into a giant flute. This high-pitched whistling is usually caused by wind rushing through an open T-track or a gap in the tower.
- The Fix: Most modern bars come with rubber "infills" to plug these gaps. If you still hear noise, adding a Wind Fairing (a plastic shield at the front of the rack) can deflect air over the bars and keep your cabin quiet enough for a conversation.
The "Garage Trap" (Height Clearance)
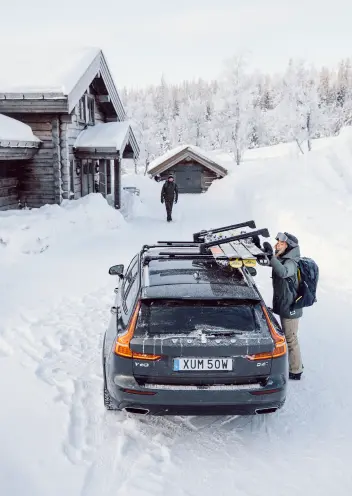
The most common way people destroy their gear isn't a car accident; it's a low-clearance garage. Whether it’s your own home or a parking garage at the airport, adding 2 to 4 feet of height to your car is a game-changer.
- The Pro Move: Measure your vehicle's total height with the rack and your tallest accessory loaded. Write that number on a Post-it note and stick it on your dashboard. It’s a simple trick that has saved thousands of bikes from a tragic end.
5. Maintenance & Safety: The Do’s and Don’ts
Can I take my rack through a car wash?
This is one of our most asked questions. The short answer: No.
Avoid automatic car washes with spinning brushes. Those heavy brushes can hook onto your bars or bike trays and literally rip the rack—or your roof rails—right off the car. If you need a wash, stick to "Touchless" washes that only use water jets, or better yet, do a classic hand wash in the driveway.
Sunroof Compatibility
Will a roof rack block your sunroof? In 95% of cases, no. Most modern towers provide enough "lift" to allow a sunroof to tilt and vent. However, if you have a massive "Panoramic" glass roof, you should be careful. Sometimes the crossbars sit just low enough that the sliding glass might graze them. Always check the manufacturer fit notes for your specific car model.
6. Accessories: The "Matchy-Matchy" Myth
One of the biggest misconceptions in the industry is that you have to stay within one brand. “I have Thule bars, so I have to buy a Thule cargo box.”
This is 100% false.
Modern roof rack accessories are almost entirely universal. A Yakima SkyBox will fit perfectly on Thule Evo bars. A RockyMounts bike rack will slide into a Yakima T-track without an issue. The only real reason to stay within the same brand is for the "One Key System." It’s incredibly convenient to have one single key that unlocks your towers, your bike racks, and your cargo box. If you mix brands, you’ll just have a heavier keychain.
7. FAQ: Quick Hits for the Road
How much weight can my roof actually hold?
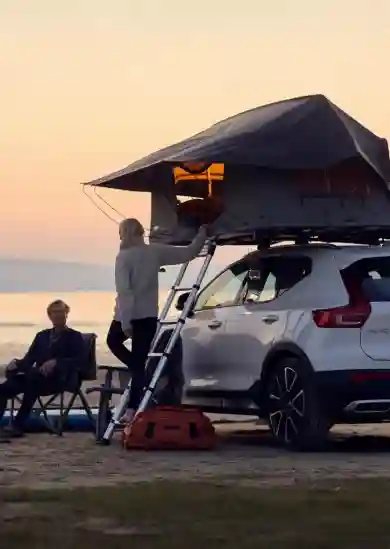
Most aftermarket systems have a 165 lb dynamic load rating. This is the weight it can safely carry while the car is moving and taking corners. The static load rating (when the car is parked) is much higher, which is why rooftop tents work. Your roof won't cave in; it's designed to support the weight of the car in a rollover.
Is it hard to install a roof rack myself?
If you can follow IKEA-style instructions and use a torque wrench (which is usually included), you can do it. Most installs take about 45 to 60 minutes. However, if you’re dealing with a Bare Roof setup, having a second pair of hands is a huge help to prevent scratching your paint.
How do I protect my car's paint?
Modern fit kits use high-density rubber pads. The secret is to make sure your roof is spotlessly clean before you put the rack on. If there is dirt trapped under the rubber pad, the vibration of the road will turn that dirt into sandpaper.
Conclusion: Ready for the Next Chapter?
Choosing a roof rack shouldn't be the hardest part of your trip. Whether you land on the precision of Thule or the rugged versatility of Yakima, the most important step is ensuring the fit is right for your vehicle's specific roof type.
Remember: Identify your roof, choose your bars based on your gear needs, and never skip the locks.
If you're still feeling the "fitment anxiety," don't guess. Stop by any Rack Attack location. Our experts live and breathe this stuff. We can show you the "Hand Test" in person, let you feel the difference between the bars, and even handle the install so you can drive away ready for whatever the weekend throws at you.
Your adventure is waiting. Let’s get the gear on your roof so you can go find it.
```